Here, you will learn about the Angular component and how to create a custom component using Angular CLI. Angular is a SPA framework, and a view is made of one or more component. An Angular component represents a portion of a view. Generally, an interactive web page is made of HTML, CSS, and JavaScript. Angular component is no different. Angular Component = HTML Template + Component Class + Component Metadata HTML template is nothing but a regular HTML code with additional Angular specific syntax to communicate with the component class. Essentially, a component class is a TypeScript class that includes properties and methods. Properties store data and methods include the logic for the component. Eventually, this class will be compiled into JavaScript. Metadata is some extra data for a component used by Angular API to execute the component, such as the location of HTML and CSS files of the component, selector, providers, etc. You can create files for a component manually or using the Angular CLI command. Angular CLI reduces the development time. So, let’s use Angular CLI to create a new component. Use the following CLI command to generate a component. All Angular CLI command starts with The following executes the The above command will create a new “greet” folder and app folder and create four files, as shown below. Above, All the component files in Angular should follow the following format: A component file should include Now, open The following figure illustrates the important part of the component class. The Component Class: Component Metadata: The The import statement gets the required feature from the Angular or other libraries. Import allows us to use exported members from external modules. For example, Now, let’s add a property and method in the component class, as shown below. Above, we have added the Open In the above HTML template, we used name property in the {{ }} interpolation to display its value and Now, it’s time to load our component, but before that, we need to host our application and load the root component. This process is called bootstrapping. Angular is a single page application (SPA) framework. So, we need to host our application in When you generate Angular application using Angular CLI, it automatically creates Here, we will load our greet component into the root component in two steps. 1. Declare a component in the root module. We want to load our new 2. Add component tag in the root HTML template. After adding a component declaration, use component tag The following figure illustrates the component bootstrap process: Run the app by executing npm start command in the terminal of VS Code. After successful compilation, open the browser and enter http://localhost:4200. The following page will be displayed. This is how we can create and use custom components in Angular. We can also create a single component file 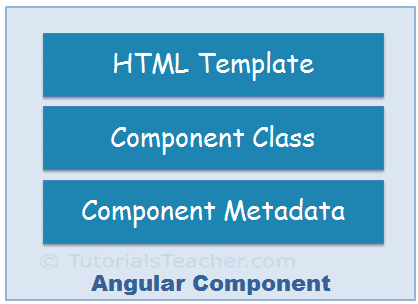
HTML Template
Class
Metadata
Generate Angular Component using Angular CLI
ng, generate or g is a command, component is an argument and then the name of the component.ng g command to generate the greet component in VS Code.
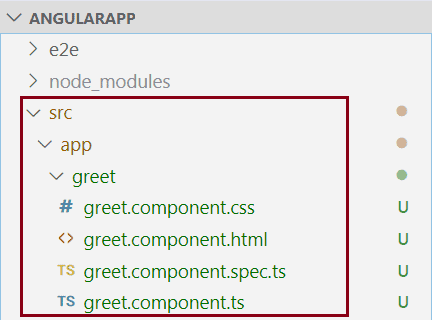
greet.component.css is a CSS file for the component, greet.component.html is an HTML file for the component where we will write HTML for a component, greet.component.spec.ts is a test file where we can write unit tests for a component, and greet.component.ts is the class file for a component.Component Naming Convention
<component-name>.component.<file-type>.component in name prefixed with the component name and followed by file type. For example, a TypeScript file for our greet component is named greet.component.ts. As you have noticed, all the files of greet component are having the same naming conventions. Visit Angular Style guide to know more about it.greet.component.ts file in VS Code, and you will see the following code.import { Component, OnInit } from '@angular/core'; @Component({ selector: 'app-greet', templateUrl: './greet.component.html', styleUrls: ['./greet.component.css'] }) export class GreetComponent implements OnInit { constructor() { } ngOnInit(): void { } }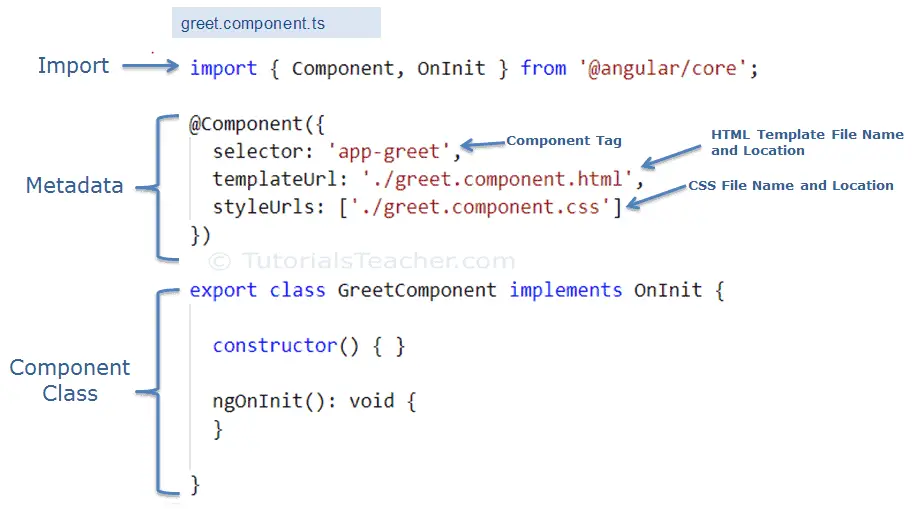
greet.component.ts includes the following parts:GreetComponent is the component class. It contains properties and methods to interact with the view through an Angular API. It implements the OnInit interface, which is a lifecycle hook.@Component is a decorator used to specify the metadata for the component class defined immediately below it. It is a function and can include different configs for the component. It instructs Angular where to get required files for the component, create and render component. All Angular components must have @Component decorator above the component class.@Component decorator and OnInit interface are contained in @angular/core library. So, we can use them after importing it.export class GreetComponent implements OnInit { constructor() { } ngOnInit(): void { } name: string = "Steve"; greet(): void { alert("Hello " + this.name); }; }name property and the greet method in the component class. Let’s use these in the HTML template.greet.component.html file, remove existing code and add the following code.<div> Enter Your Name: <input type="text" value={{name}} /> <br /> <button (click)="greet()">Greet Me!</button> </div>greet() function as click event. Lean more about it in event binding section.Bootstrapping Component
index.html, and then we need to define a root module to bootstrap our root component. Index.html will be the only web page in an Angular application, and that’s why it is called SPA.index.html, root component app.component.ts, root module app.module.ts, and HTML template app.component.html for you. The AppComponent class in app.component.ts is a root component, and the AppModule class in app.module.ts is a root module.GreetComponent into the root component. So, the root module must know about it. We can do it by adding the GreetComponent in the declarations array in app.module.ts, as shown below.import { BrowserModule } from '@angular/platform-browser'; import { NgModule } from '@angular/core'; import { AppRoutingModule } from './app-routing.module'; import { AppComponent } from './app.component'; import { GreetComponent } from './greet/greet.component'; //import GreetComponent @NgModule({ declarations: [ AppComponent, GreetComponent // <- include GreetComponent in declarations ], imports: [ BrowserModule, AppRoutingModule ], providers: [], bootstrap: [AppComponent] }) export class AppModule { }<app-greet></app-greet> in the HTML file of the root component, which is app.component.html, as shown below.<div> <app-greet></app-greet> </div>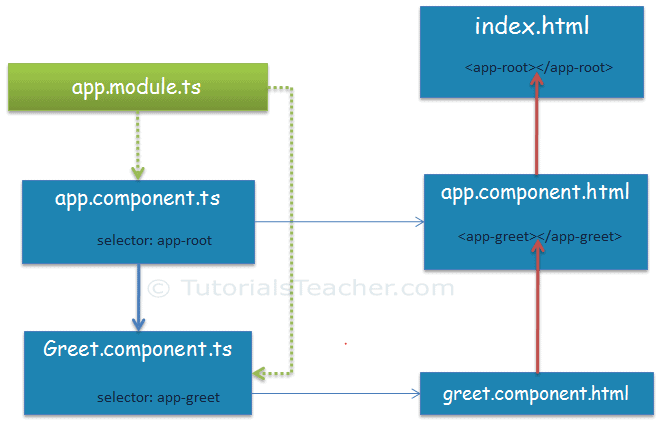

greet.component.ts if the HTML code of a component is less. Use the template parameter in the @Component decorator to include HTML of the component. The following greet component gives the same result as above.import { Component } from '@angular/core'; @Component({ selector: "app-greet", template: `<div> Enter Your Name: <input type="text" value={{name}} /> <br/> <button (click)="greet()">Greet Me!</button> </div>` }) export class GreetComponent { name: string = "Steve"; greet(): void { alert("Hello " + this.name); }; }
Note:
TypeScript is an open-source, object-oriented language developed and maintained by Microsoft. It is a typed superset of JavaScript that compiles to plain JavaScript.
Note:
A component can have a single file or multiple files. A single TypeScript file can include an HTML template, component class, and component metadata.
Example: Component Class
Example: Add Properties and Methods in the Component Class
greet.component.ts
Example: Add Component in the root module app.module.ts
app.component.html
Example: Component Class with HTML Template
Leave a Reply